Battery Box
In the Fall of 2003, because we are planning a long trip to Mexico and the Beyond, I thought it prudent to test our five year old flooded batteries.
First, a digression to explain how they are set up. The stock boat comes with 560Ah of capacity that is divided up between a 420Ah house bank, and a 140Ah switchable battery that is used by the bowthruster. When not in use, the bowthruster battery is put in parallel with the rest of the house bank, providing 560Ah of capacity. When the bowthruster is in use, it is put in series, resulting in 24v power for the bowthruster. Pretty slick, really!
I had replaced the bowthruster battery last year with a pair of 85Ah 12v batteries, so I knew they were OK.
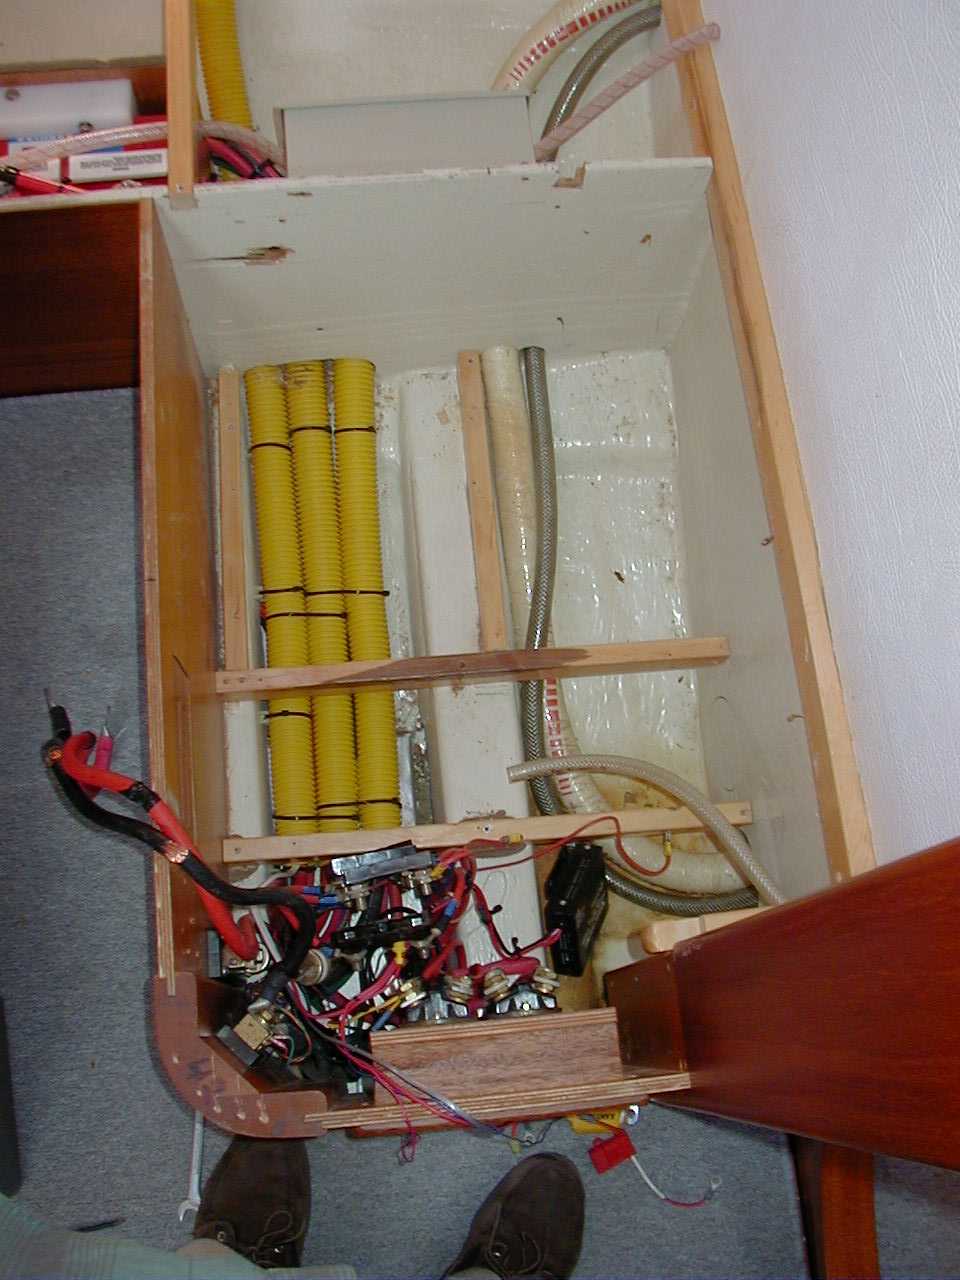
Unfortunately, I discovered that our nominal 420Ah house bank was capable of putting out only 200Ah! Time to change batteries. The problem was that, like so many things on the boat, they were a weird Euro-size, which was unavailable in the United States. They were quite squat, only 7-3/8" high, and the battery box they sat in was correspondingly shallow, only 9" high. There are not many batteries that short in the US, and the few that are have nowhere near the capacity of the old batteries.
I really coveted a set of Trojan T-105 6v golf batteries. They have a great reputation, are available anywhere (at least, where there is a golf course!), and are a great value. But they are really tall: nearly 11 inches, or almost 4 inches taller than the old batteries!
After a lot of measuring and a bit of wishful thinking, I finally convinced myself that there was enough space under the settee for a new battery box tall enough to fit the Trojans. So, with nothing but a handsaw, chisel, and drill (I was located far from home), I built myself a new box.
To minimize potential problems, I built the new box to the exact same footprint as the old one. Only its height, 11-1/2", was different. It turned out that fitting it in was straightforward, although I had to move a crossbrace to make enough vertical space.
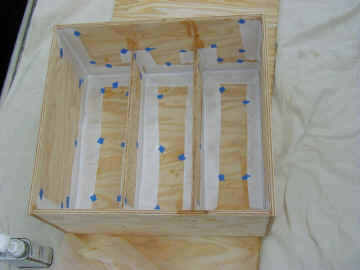
The new battery box before applying epoxy. The two partitions
on the bottom are to both stiffen the box, and localize
any spilled battery acid.
|
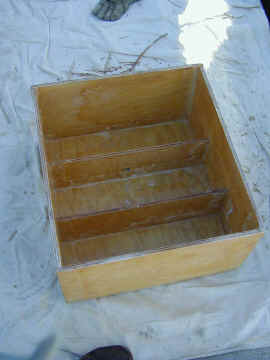
The box after epoxying. Lesson learned: hold fiberglass
tape in place with staples, not tape. The tape was unbelievably
messy to remove!
|
Here's the completed box in place:
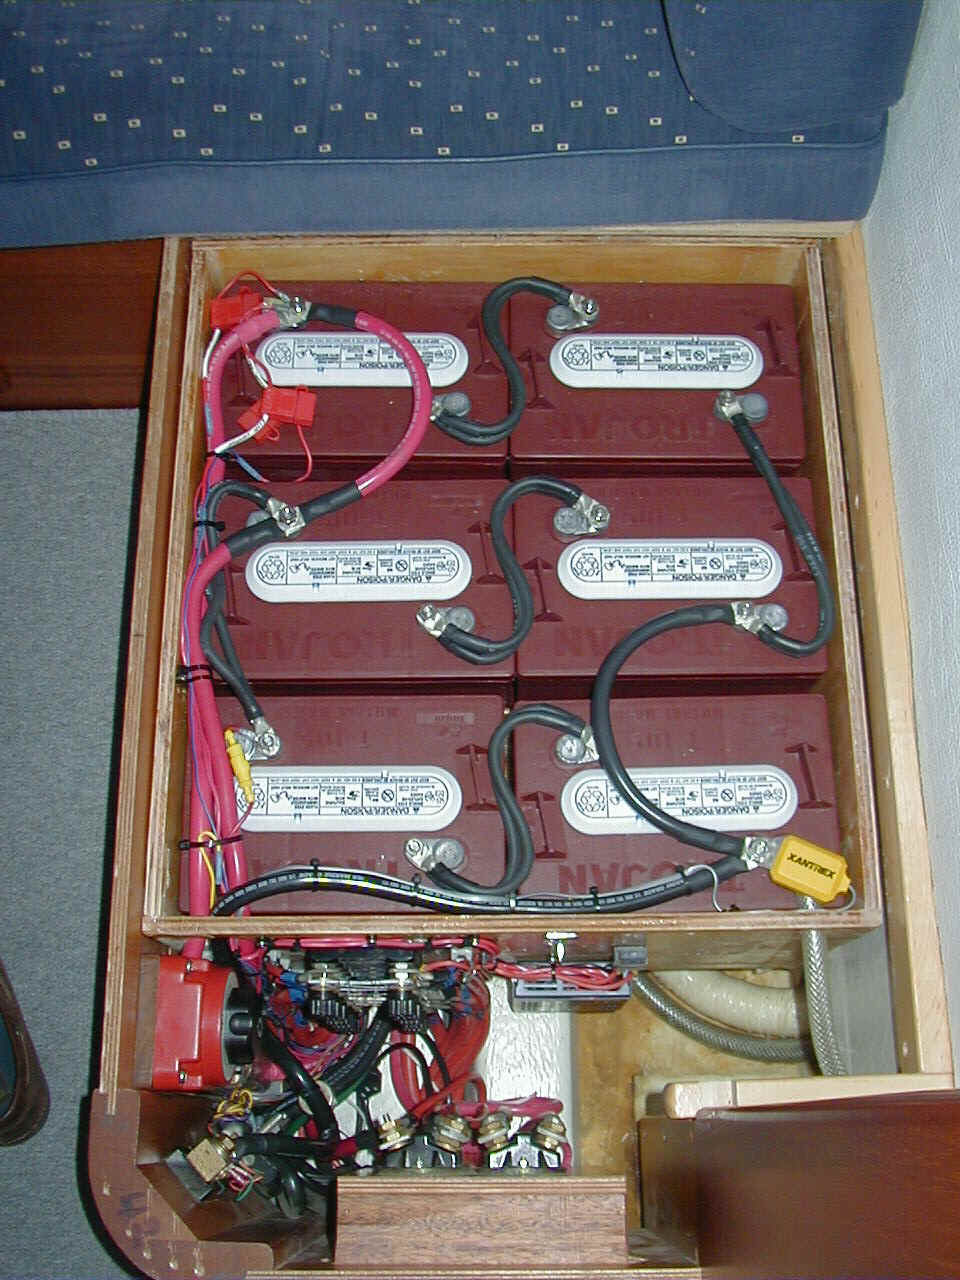
The battery box is held in place by screws along the sides and bottom. The batteries themselves are held down by the lid, which is held in place by a set of barrel bolts and a latch.
Because the Trojans are rated at 225Ah (at 6v), the six I used gives a total capacity of 675Ah. Add on the 170Ah for the bowthruster batteries, this gives a total capacity of 845Ah, up from the stock 560, without giving up any storage space!
Cost
| Batteries | $420 |
| Plywood | 60 |
| Cables | 60 |
| Epoxy | 30 |
| Fiberglass tape | 20 |
| Misc. Hardware | 10 |
| Total | $600 |