Access Plate for the Starboard Diesel Tank
While hard on the wind during a NORPAC race, I went down below and smelled diesel fuel. Turns out, the access plate for the starboard fuel tank was leaking — with the boat heeled over, fuel was pouring out of the tank! It's difficult to see how this access plate ever worked. It was installed in a casual, almost amateur, way. It was just a thin plate, covering a thin gasket, screwed down on to the tank, using no backing plate. Instead, bits of aluminum had been sputter welded on to the backside of the tank top, and the screws tapped into that, almost guaranteeing that they would eventually become stripped. It didn't help anything that there were four extra, unused hole drilled through the tank and gasket as well!
I decided to make a new access plate, using a thick backing ring with tapped holes. This would allow me to really screw the plate down hard, ensuring no leaks. For the plate and ring I used 5052 bare aluminum, 3/32" thick. For the two gaskets, one on each side of the tank, I used Aramid/Buna-N, 3/32" thick (from McMaster-Carr, part number 9470K39).
Unfortunately, because of the way they had constructed the old access hole, the surface underneath was uneven, so I had to cut a bigger hole to get a nice, smooth surface on both sides in order for the gaskets to engage.
Details below.
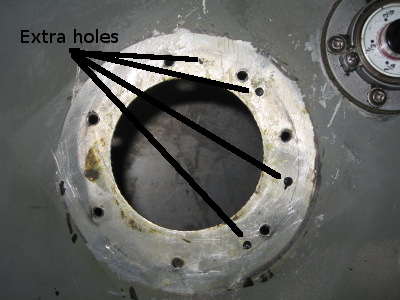
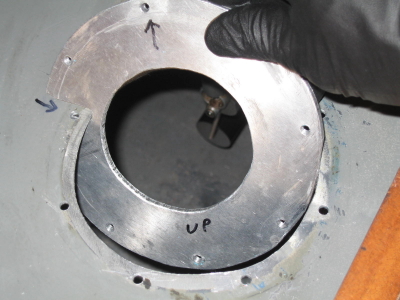
The original access hole in the starboard fuel tank. Note the extra holes! There were matching holes on the gasket. Fuel could easily leak through!
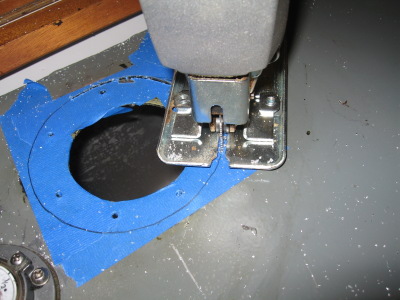
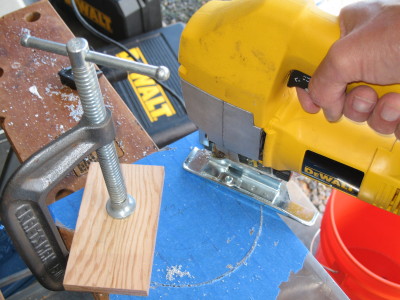
Cutting a bigger access hole with a scroll saw, fitted with a metal cutting blade. This was necessary to get a smooth surface on the underside.
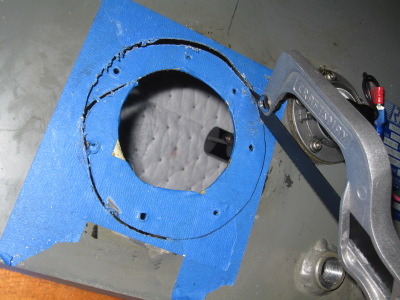
There wasn't enough maneuvering room to finish the cut with the scroll saw, so I had to finish with a hacksaw. Note the oil absorbent pad inside the tank to catch any chips that fell through.
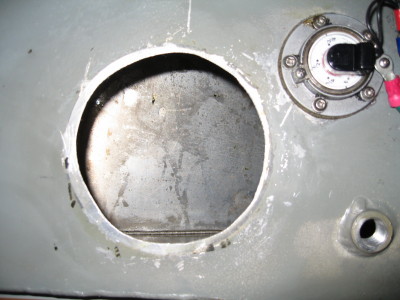
The finished hole.
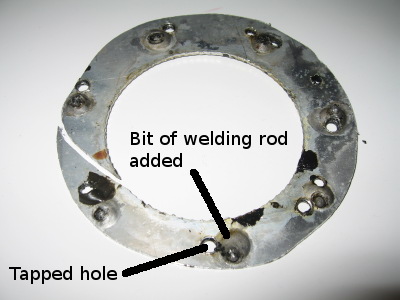
Here's the backside of the waste that was cut out. The tank is only 0.090" thick, so a bit of welding rod had been sputtered on next to each hole to give something for the tap to cut into, but it wasn't enough. At best, there was only one side of a thread or two holding on!
Cutting the new plate using a scroll saw.
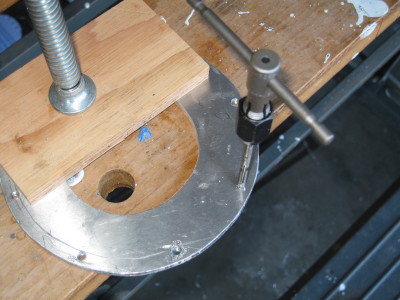
Tapping the threads in the backing ring.

Cutting a slot in the backing ring using a grinder. This enables the ring to be removed from the tank.
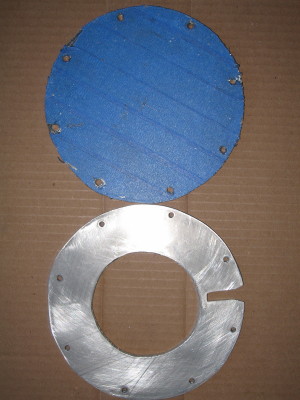
The finished access plate (top) and backing ring (bottom). The ring is designed so that it can be slipped into the tank using the slot.
Slipping the backing ring into the tank, using the slot.
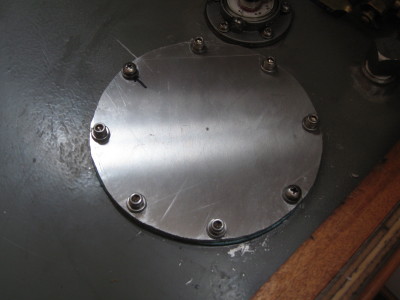
The finished access plate. The screw at the upper left (marked with an arrow) is much longer than the others. It is engaged first, allowing the backing ring to be held on, while (trying) to engage the other screws.